How to Handle Multiple Scenes in Godot

Published
Introduction
Have you found yourself looking for a more flexible way to manage scenes in your Godot project? Maybe you want to pass data between scenes in your game, or you want a UI that stays on screen between levels. In any of these cases and many more, the scene manager we will be building in this tutorial can help!
This tutorial assumes a basic knowledge of the Godot editor and GDscript. I am using Godot 4.2.2, but the concepts should also apply to other versions. I will be starting in a fresh project but it works just the same in an existing project. With that out of the way let’s get started!
The example project can be found here.
Creating a Root Node
To effectively manage the active scene of our game, we will need to create a root node that will hold the rest of our game nodes.
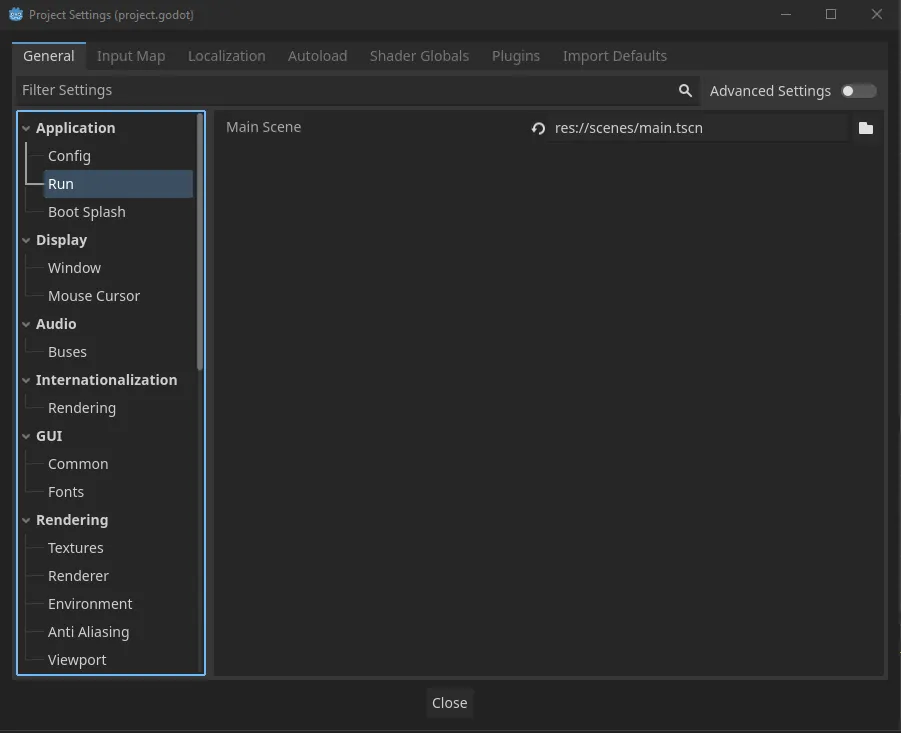
Create a default Node object and name it whatever you want. We want this to be our main scene, and we can set that in our project settings.

With the root node created, it’s time to write some code.
Creating The GameManager Script
Add a new script on the node you just created and name it “game_manager.gd”. Let’s start with the basic structure:
extends Node
class_name GameManager
@export var current_scene: Node
This script will hold all of our scene-handling logic, but it can also hold anything else for your game such as global data or game state variables. Think of it as the central area that every node in your game can see.
We’re setting the class_name and creating a variable to keep track of our currently active scene. Any data you want saved between scenes can be given to the GameManager class. You could also add scene transitions here, or even background music.
Adding The “Change Scene” Functions
Now let’s add the core functionality for changing scenes:
func change_scene(scene_path: String) -> void:
call_deferred("_deferred_change_scene", scene_path)
func _deferred_change_scene(scene_path) -> void:
var new_scene = load(scene_path).instantiate()
remove_child(current_scene)
current_scene.queue_free()
add_child(new_scene)
current_scene = new_scene
These functions handle the process of swapping out scenes. The change_scene function uses call_deferred to ensure the scene change happens at a safe time, avoiding potential issues with ongoing processes. The _deferred_change_scene function does the actual work of loading the new scene, removing the old one, and setting up the new one.
Making The Function Accessible From Anywhere
To make our scene manager accessible from anywhere in our game, we’ll use the “static” keyword:
static var _instance: GameManager
func _ready() -> void:
if _instance == null:
_instance = self
static func change_scene(scene_path: String) -> void:
if _instance:
_instance.call_deferred("_deferred_change_scene", scene_path)
The static keyword makes the variable or function belong to the class instead of any specific instance. We create a static instance variable to keep track of our single GameManager object, set in the _ready function. The static change_scene function can now be called from anywhere, using the instance to call the deferred function.
The Full GameManager Script
Here’s the complete script we’ve built:
extends Node
class_name GameManager
static var _instance: GameManager
@export var current_scene: Node
func _ready() -> void:
if _instance == null:
_instance = self
static func change_scene(scene_path: String) -> void:
if _instance:
_instance.call_deferred("_deferred_change_scene", scene_path)
func _deferred_change_scene(scene_path) -> void:
var new_scene = load(scene_path).instantiate()
remove_child(current_scene)
current_scene.queue_free()
add_child(new_scene)
current_scene = new_scene
Using The Scene Manager
To use this scene manager, simply call the change_scene function from the GameManager class. Here’s an example that changes to a new scene when the Enter button is pressed:
func _physics_process(delta: float) -> void:
if Input.is_action_just_released('ui_accept'):
GameManager.change_scene("res://scenes/levels/level2.tscn")
All you need to provide is the path to the scene you want to change to.
Conclusion
With that, we have created a simple but flexible scene manager. By putting all of the logic in the same place, it should be easy to fit into your project and edit accordingly. The demo project I created can be found here. Thank you for reading!